Old-Fashioned Peanut Butter Eggs: A Sweet Journey to Childhood Easter
As the days lengthen and the first hints of spring emerge, thoughts naturally turn to Easter. Beyond the bunnies and colorful baskets, there’s a timeless tradition that brings a unique wave of nostalgia: homemade peanut butter eggs. These aren't just any candy; they are a delightful taste of childhood, conjuring memories of church bake sales, grandma's kitchen, and simple, joyful celebrations. Forget the mass-produced versions; the true magic lies in the rich, creamy peanut butter filling enrobed in a smooth chocolate shell, crafted with love and a dash of Easter spirit. What makes these old-fashioned peanut butter eggs so special? It's their irresistible homemade charm and the surprising ease with which you can bring this tradition to life in your own kitchen.
The Enduring Appeal of Homemade Peanut Butter Eggs
There’s something inherently comforting about homemade treats, and
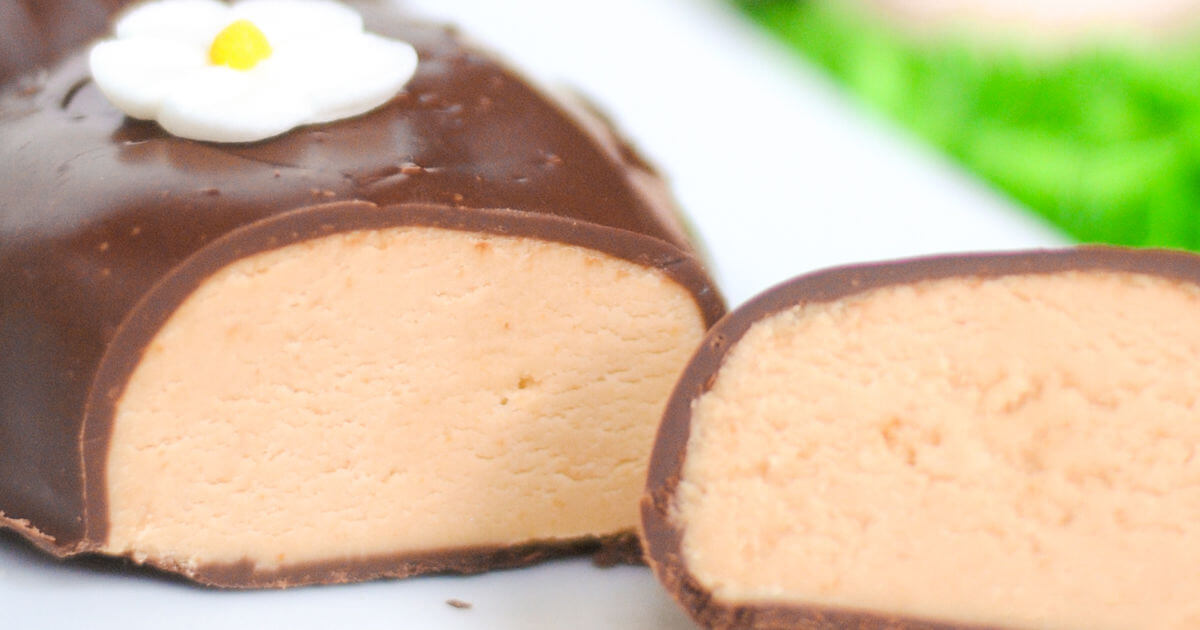
homemade peanut butter eggs stand at the pinnacle of Easter nostalgia. For many, these aren't just a seasonal candy; they're a direct link to cherished childhood memories. Perhaps you remember them affectionately as "Church Eggs," lovingly made and sold by community groups as fundraisers, or even "Amish Eggs," hinting at their simple, wholesome origins. My own memories are filled with the anticipation of that first bite – the snap of chocolate giving way to the velvety, sweet peanut butter interior, a flavor profile far superior to anything store-bought.
The beauty of making these treats yourself lies in the control you have over every element. While store-bought options are convenient, they often compromise on the texture and flavor that define truly great peanut butter eggs. Homemade versions boast an unparalleled richness, a perfectly balanced sweetness, and a melt-in-your-mouth quality that simply can't be replicated on an industrial scale. This personal touch transforms a simple confection into a sensory experience, a direct connection to simpler times and the warmth of family traditions. It's not just about the ingredients; it's about the care, the aroma filling your kitchen, and the shared joy they bring.
Crafting Your Own Taste of Childhood: The Simple Recipe
One of the most appealing aspects of these delectable treats is their surprising simplicity. You might imagine a complex process, but the truth is, the core of these old-fashioned peanut butter eggs comes together with just a handful of ingredients and minimal hands-on time. The filling, often considered the heart of the candy, is truly effortless.
The basic components typically include:
- Peanut Butter: The star of the show! Both creamy and crunchy varieties work, though creamy is traditional for that smooth texture. You can use a name-brand peanut butter or a natural variety; both yield delicious results.
- Powdered Sugar: This fine sugar is crucial for achieving that silky-smooth, melt-in-your-mouth consistency in the filling.
- A touch of liquid: Some recipes call for a small amount of evaporated milk or water to bind the peanut butter and powdered sugar, creating an extra creamy filling. Start with a tablespoon or two and add sparingly until the mixture resembles moist crumbs that can be pressed together.
- Chocolate: For the irresistible outer shell.
Mixing the Magic: The Peanut Butter Filling
Creating the filling is delightfully straightforward. Whether you opt for a stand mixer or a hand mixer, the process is largely the same:
- Combine the peanut butter and powdered sugar in a bowl.
- Start mixing on low speed, gradually increasing as the ingredients begin to incorporate.
- If using, add your chosen liquid (evaporated milk or water) one teaspoon at a time. The mixture will initially look crumbly, almost like wet sand. Keep mixing until it comes together into a cohesive, pliable dough. Be careful not to add too much liquid, as this can make the filling too soft and difficult to shape.
The beauty of this simple mixture is its versatility. Once combined, the peanut butter filling is ready to be shaped. You can choose to hand-roll small, rustic egg shapes, which adds to their homemade charm, or utilize silicone egg molds for perfectly uniform confections. If using molds, your kids (or even adult friends!) will love helping to press the filling into the cavities. For a perfect copycat experience that rivals popular store-bought versions, check out
Reese's Copycat Peanut Butter Eggs: 3-Ingredient Easter Treat, which highlights the foundational simplicity. Regardless of the shaping method, a crucial tip is to
chill your peanut butter centers in the refrigerator or freezer for at least 15-30 minutes before dipping. This firming-up step makes them much easier to handle and prevents crumbling during the chocolate coating process.
Mastering the Chocolate Shell & Finishing Touches
While the peanut butter filling is generally foolproof, dipping the eggs in chocolate can sometimes feel like the trickiest part of the process. But with a few simple techniques, you can achieve a beautifully coated old-fashioned peanut butter egg every time.
Choosing Your Chocolate
The type of chocolate you use significantly impacts the final taste and appearance:
- Melting Wafers (Candy Melts): These are often the easiest to work with, as they melt smoothly and set quickly without needing tempering. They come in various colors, allowing for fun variations.
- Chocolate Chips with Shortening/Oil: If using regular chocolate chips, adding a tablespoon of vegetable shortening or coconut oil per cup of chips can help them melt smoother and create a thinner, more dippable consistency that sets up well.
- High-Quality Baking Chocolate: For the most luxurious taste, opt for a good quality dark, milk, or semi-sweet chocolate. If you're feeling adventurous, you can temper the chocolate for a professional, glossy finish and a satisfying snap. However, for most home bakers, the first two options are perfectly sufficient and less intimidating.
Dipping Techniques for Success
- Melt Carefully: Melt your chosen chocolate in a microwave (in 30-second intervals, stirring in between) or over a double boiler until smooth. Don't overheat it, as this can cause it to seize.
- Keep it Warm: If dipping a large batch, keep your chocolate warm over a very low heat or in a warm spot to maintain its fluidity.
- The Fork Method: Place a chilled peanut butter egg on a fork or a special candy-dipping tool. Submerge it completely in the melted chocolate. Tap the fork gently against the side of the bowl to allow excess chocolate to drip off.
- Transfer with Care: Gently slide the chocolate-coated egg onto a parchment paper-lined baking sheet.
- Work Quickly: Chocolate sets relatively fast, especially if your peanut butter centers are cold. Work efficiently to prevent uneven coating.
Decorating Your Easter Masterpieces
Once dipped, the fun doesn't stop! Before the chocolate fully sets, you can add various decorations to make your peanut butter eggs even more festive:
- Sprinkles: Classic and colorful, a quick sprinkle of rainbow or pastel jimmies adds instant cheer.
- Sugar Flowers: Small, pre-made sugar decorations from craft or hobby stores create an elegant touch.
- Contrasting Drizzle: Melt a different color of chocolate (white chocolate over dark, or vice versa) and drizzle it artfully over the set eggs for a sophisticated finish.
Remember, no matter how perfectly or imperfectly they look, the rich, sweet flavor of your homemade peanut butter eggs will be absolutely divine. The charm of "homemade" includes a little rustic beauty! You can also control the size of your eggs; small ones are easier to dip and share, while larger ones make a more dramatic statement.
Sharing the Sweetness: Beyond the Easter Basket
Old-fashioned peanut butter eggs are more than just an Easter basket filler; they are a versatile treat perfect for sharing, gifting, and savoring. Their richness means that a few small pieces are often incredibly satisfying, making them ideal for cutting and sharing among friends and family – just like they were often divided at church bake sales or by grandmas in days gone by.
These delightful chocolate peanut butter eggs make fantastic gifts. Arrange them beautifully in a decorative box or bag, tied with a spring ribbon, and you have a thoughtful, personalized present that speaks volumes. They’re also perfect for class parties, office potlucks, or simply having on hand for an afternoon treat with a cup of coffee or tea.
To store your homemade peanut butter eggs, keep them in an airtight container in the refrigerator for up to two weeks. Some even prefer them chilled, as the cold enhances the firmness of the peanut butter filling and the snap of the chocolate. They can also be frozen for longer storage, ensuring you can enjoy a taste of Easter long after the holiday has passed.
A Taste of Timeless Tradition
Old-fashioned peanut butter eggs are truly a taste of childhood Easter, a nostalgic confection that brings joy and warmth to any celebration. Their simplicity in creation belies their profound impact – a rich, creamy filling encased in decadent chocolate, offering a unique homemade experience that store-bought candies simply cannot replicate. By embracing this easy, rewarding recipe, you’re not just making a treat; you're preserving a tradition, creating new memories, and sharing a little piece of edible history. So this Easter, gather your ingredients, enlist some eager helpers, and embark on the sweet journey of crafting your own batch of these irresistible chocolate peanut butter eggs. Your taste buds, and your loved ones, will thank you.