As the days lengthen and the first hints of spring emerge, thoughts often turn to the joyous traditions of Easter. Among the vibrant colors and festive decorations, one sweet treat consistently steals the show: the humble yet utterly irresistible homemade peanut butter egg. While store shelves might boast their own versions, there's an undeniable magic and superior flavor that comes from crafting these chocolate-covered delights right in your own kitchen. And the best part? They are far easier to make than you might ever imagine, often requiring just a handful of ingredients and surprisingly little hands-on time.
Forget the waxy chocolate and sometimes artificial taste of mass-produced candies. Homemade peanut butter eggs offer a creamy, rich, and deeply satisfying experience that evokes cherished memories and creates new ones. Whether destined for Easter baskets, shared at family gatherings, or simply enjoyed as a well-deserved personal indulgence, these confections promise a delightful journey for your taste buds, proving once and for all that homemade truly is better.
Why Homemade Peanut Butter Eggs Reign Supreme: Beyond the Bakery Aisle
The allure of a homemade treat often lies in its ability to transcend mere sweetness, offering a taste of tradition, personal touch, and unmatched quality. When it comes to peanut butter eggs, this sentiment holds particularly true. There are several compelling reasons why taking the DIY route elevates this Easter classic to an entirely new level.
A Taste of Nostalgia and Tradition
For many, the mention of Old-Fashioned Peanut Butter Eggs immediately conjures images of childhood Easters. These aren't just candies; they're edible memories, reminiscent of church bake sales, community fundraisers, and the comforting aroma of a grandmother's kitchen. Often affectionately known as "Church Eggs" or "Amish eggs," these treats were a staple of spring, passed down through generations. The homemade versions capture that authentic, heartfelt essence that store-bought imitations simply can't replicate. When you bite into one, you're not just tasting peanut butter and chocolate; you're tasting history, family, and the warmth of shared traditions.
Unbeatable Flavor and Texture Control
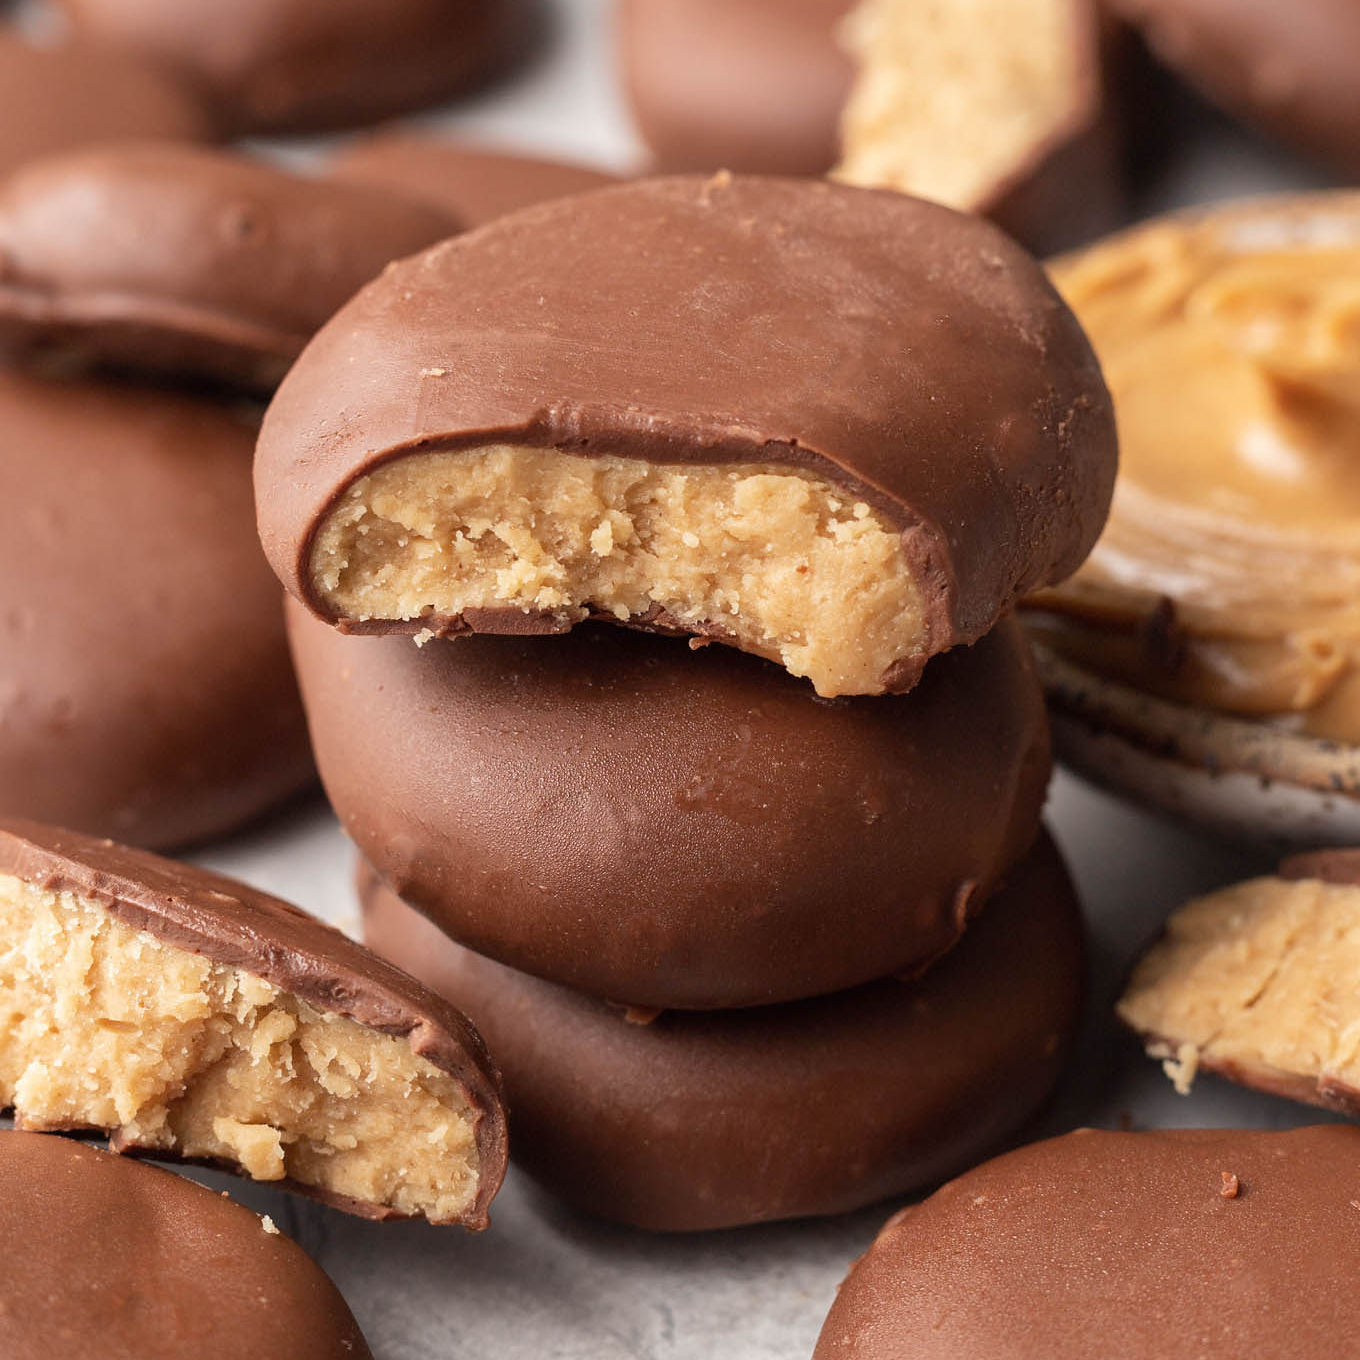
Perhaps the most significant advantage of making peanut butter eggs at home is the unparalleled control you gain over the ingredients and the final product. You decide on the quality of your peanut butter, opting for a smooth, creamy variety that will melt in your mouth. You control the sweetness of the filling, adjusting the powdered sugar to your exact preference. Furthermore, the chocolate-to-peanut-butter ratio can be perfected, ensuring every bite delivers that ideal balance of rich chocolate shell and velvety, dense peanut butter center.
- Quality Ingredients: Choose your favorite brand of creamy peanut butter (natural or conventional, both work well as long as they are no-stir). Opt for high-quality chocolate for melting, as this forms a significant part of the flavor profile.
- Custom Sweetness: Tailor the sugar content in the filling. Prefer a less sweet, more peanut-butter-forward taste? Reduce the powdered sugar slightly.
- Perfect Ratio: By shaping the filling yourself and controlling the chocolate coating, you achieve a harmonious balance that often surpasses pre-made versions, which can sometimes have an overly thick or waxy chocolate shell.
Surprising Simplicity and Cost-Effectiveness
Despite their gourmet appeal, homemade peanut butter eggs are remarkably simple to create. With as few as three core ingredients (peanut butter, powdered sugar, and chocolate), and about 30 minutes of active preparation, you can produce a batch that tastes infinitely superior to anything you'd buy. This ease makes them a fantastic project for busy families, and a cost-effective way to stock up on delicious Easter treats, gifts, or party favors. The Reese's Copycat Peanut Butter Eggs: 3-Ingredient Easter Treat article further highlights this incredible simplicity.
Crafting Your Perfect Peanut Butter Eggs: Ingredients, Tools, and Techniques
Embarking on your homemade peanut butter egg adventure requires only a few key components and some basic kitchen tools. The beauty of this recipe lies in its straightforward nature, making it accessible even for novice bakers.
The Heart of the Treat: The Peanut Butter Filling
The filling is undoubtedly the star of the show. Achieving that perfectly creamy, crumbly-yet-cohesive texture is simpler than you think.
- Peanut Butter: Creamy peanut butter is essential. While some recipes might suggest natural peanut butter, ensure it's a "no-stir" variety if you go that route, as the oil separation in traditional natural peanut butter can affect the consistency. Brand-name or store-brand, the key is creamy!
- Powdered Sugar (Confectioners' Sugar): This fine sugar provides the necessary sweetness and structure without adding graininess.
- A Touch of Liquid (Optional but Recommended): A small amount of liquid, like evaporated milk or even water, helps bind the peanut butter and powdered sugar, preventing the filling from being too dry or crumbly. Start with just a tablespoon or two and add more by the teaspoon until the mixture holds together when pressed. The reference context notes that Granny used evaporated milk but found water worked just as well, saving on waste.
- Flavor Boosters: A pinch of salt enhances the peanut butter flavor, while a splash of vanilla extract can add a delightful warmth and depth.
Method for the Filling: Combine the peanut butter and powdered sugar in a mixing bowl. Using a stand mixer with a paddle attachment or a hand mixer, beat until well combined. It will initially look like coarse crumbs. Gradually add your chosen liquid (evaporated milk or water) one teaspoon at a time, mixing after each addition, until the mixture comes together into a pliable dough. It should be firm enough to hold its shape but still soft and creamy.
The Irresistible Chocolate Shell
The chocolate coating is what elevates these peanut butter centers into true confectionery masterpieces.
- Chocolate Choice: Good quality melting chocolate, chocolate chips (milk, dark, or semi-sweet), or even chocolate melting wafers work perfectly. Avoid standard chocolate bars designed for eating, as they often don't melt as smoothly for coating.
- Melting Technique: Use a double boiler for gentle, even melting, or microwave in short bursts (30 seconds at a time), stirring well after each interval, to prevent scorching.
Essential Equipment for Success
You don't need a professional kitchen setup to make these. A few standard items will suffice:
- Mixer: A stand mixer makes the filling process a breeze, but a hand mixer works perfectly well too.
- Egg Molds (Optional but Recommended): For perfectly shaped eggs, silicone egg molds are a game-changer. They ensure uniformity and make the process incredibly foolproof, especially for little helpers.
- Baking Sheet and Parchment Paper: For chilling the filling and setting the chocolate.
- Dipping Tools: A fork, a chocolate dipping tool, or even toothpicks can assist in coating the eggs.
From Prep to Perfection: Tips, Tricks, and Creative Flair for Your Peanut Butter Eggs
While the process is simple, a few expert tips can ensure your homemade peanut butter eggs turn out flawlessly, looking and tasting like they came from a high-end candy shop.
Mastering the Peanut Butter Filling
- Chill for Control: Once your peanut butter filling is mixed, wrap it in plastic wrap and chill it in the refrigerator for at least 30 minutes, or even an hour. This makes the mixture much easier to handle, shape, and prevents it from being too sticky.
- Shaping Secrets: If using egg molds, firmly press the chilled filling into each cavity, leveling the top with an offset spatula or knife. If free-forming, scoop out portions (start with 1-2 tablespoons for small eggs, as Granny's notes suggest smaller ones are easier), roll them into balls, then gently flatten and shape them into an egg or disc. Remember, these are rich, so smaller portions are often more satisfying for sharing.
- Uniformity: For consistent size and cooking, use a cookie scoop or small ice cream scoop to portion out the peanut butter mixture before shaping.
The Art of Dipping
Dipping can seem daunting, but with a little practice, you'll achieve beautifully coated eggs.
- Maintain Chocolate Temperature: Keep your melted chocolate warm enough to be fluid but not so hot that it "seizes" or burns the peanut butter filling. If it cools too much, gently reheat.
- Efficient Dipping: Drop a chilled peanut butter egg into the melted chocolate. Using a fork or dipping tool, carefully roll it to coat completely. Lift it out, tapping the fork gently against the rim of the bowl to allow excess chocolate to drip off. This prevents puddles of chocolate around the base.
- Quick Placement: Place the chocolate-coated egg onto a sheet of parchment paper or wax paper. Work relatively quickly, as the chocolate will start to set.
- Double Coat (Optional): For an extra thick, glossy shell, allow the first coat to set slightly, then dip again.
Adding Creative Flair and Decorations
This is where you can truly personalize your peanut butter eggs and make them unique gifts or festive display items.
- Sprinkles: Before the chocolate sets, sprinkle with colorful nonpareils, jimmies, or even coarse sea salt for a sweet and salty twist.
- Sugar Decorations: As seen in the reference, pre-made sugar flowers or other edible embellishments found at craft stores add a charming touch.
- Chocolate Drizzles: After the main chocolate coat has set, melt a contrasting color of chocolate (white chocolate is popular) and drizzle it artfully over the eggs for a sophisticated finish.
- Edible Glitter: For a truly sparkly Easter treat, a dusting of edible glitter can make these eggs shine.
Storing Your Delicious Creations
Once set, homemade peanut butter eggs should be stored in an airtight container in the refrigerator to maintain their freshness and firm texture. They can last for up to two weeks, though it's rare they stick around that long!
The Ultimate Easter Treat: Sharing and Gifting Your Homemade Peanut Butter Eggs
Beyond being a personal indulgence, homemade peanut butter eggs are truly meant for sharing. They embody the spirit of generosity and togetherness that defines the Easter season. Whether you're filling Easter baskets, contributing to a class party, or simply offering a thoughtful, handcrafted gift, these eggs are always a welcome sight.
Sara's anecdote about her mom cutting the rich, sweet eggs into pieces to share perfectly illustrates their satisfying nature. These aren't just regular candy; they are a rich, artisanal treat that is best savored, making them ideal for sharing. Making these eggs with children can also become a cherished annual tradition, creating lasting memories alongside delicious confections.
So this Easter, bypass the store-bought options and embrace the joy and simplicity of creating your own batch of homemade peanut butter eggs. You’ll be rewarded with a superior taste, a burst of nostalgia, and the undeniable satisfaction of having crafted something truly special.
